Coverages Coming Home to GIS World.
Step 1: Installation
- Open a terminal and install the required dependency:
pip3 install xmltodict
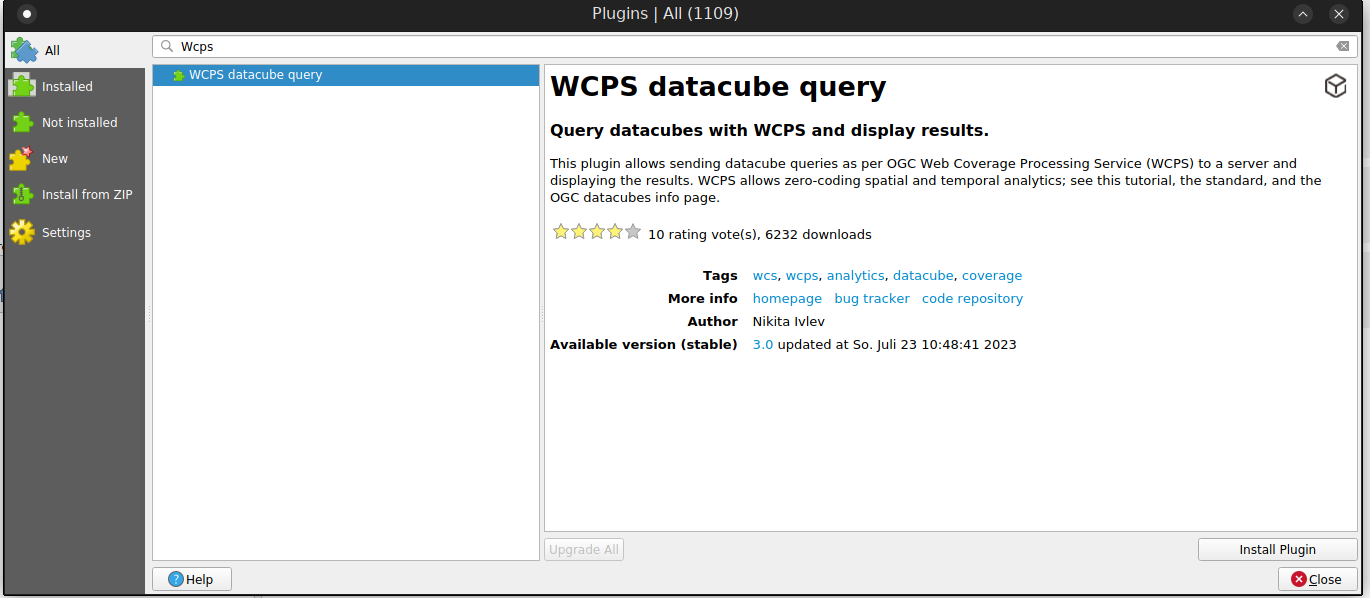
- In QGIS, choose Plugins → Manage and Install Plugins….
- Search for wcps; the result should be WCPS datacube query.
- Click Install Plugin to add it to QGIS.
- Access the plugin via Plugins → WcpsClient1 → WCPS 1.0 Client or by clicking the new cube icon on the toolbar.
Step 2: Server configuration
To start working with the plugin, you need to add a server to which requests will be sent. To do this, click on the New button and specify a name/link to the server, then click OK. After adding the server data, select it from the available ones in the drop-down list.
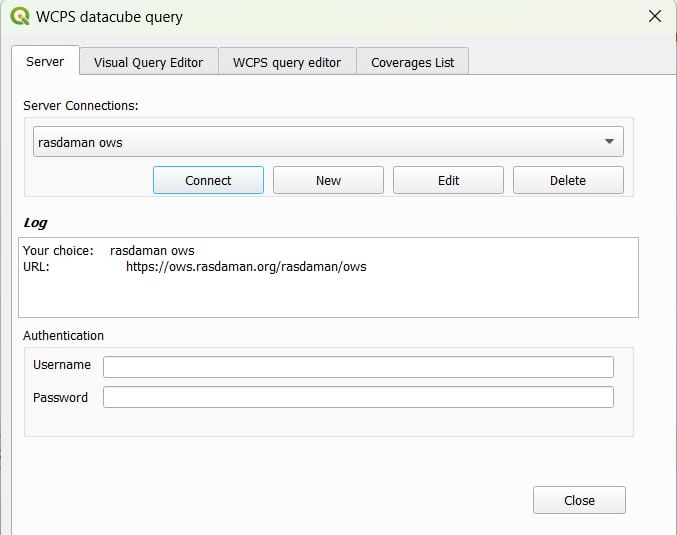
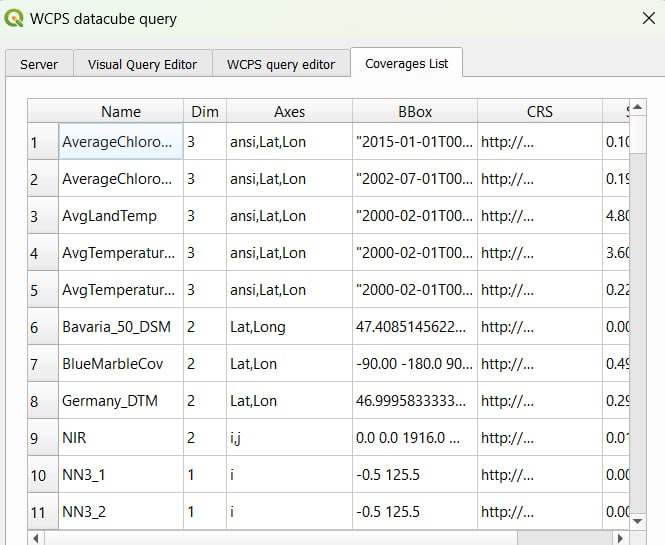
If the server requires authentication to send requests, you can specify credentials in the Username and Password fields. After specifying all the necessary data, click the Connect button to connect to the server. This should show a list of all available coverages on the Coverage List tab.
Step 3: Query writing
You can create a query using the WCPS Query Editor and Visual Query Editor tabs.
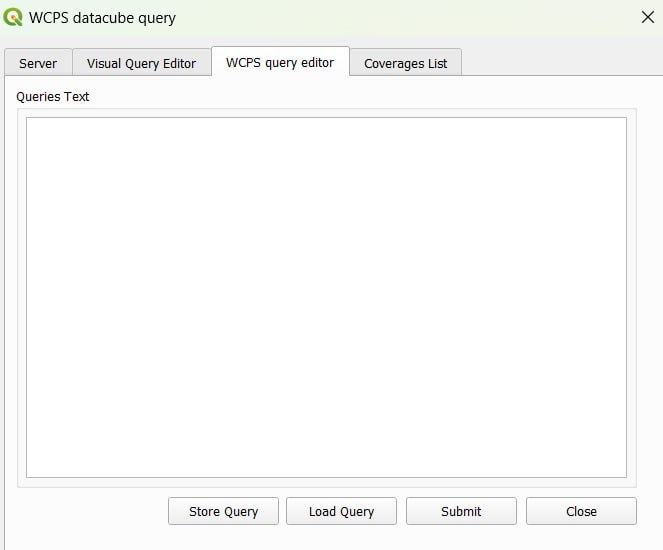
On the WCPS Query Editor tab the query is entered as free text. Queries can be persisted and loaded with the Store Query and Load Query buttons. To submit a query to the server, click the Submit button. If the request is successful, a window for choosing further actions with the result will be shown.
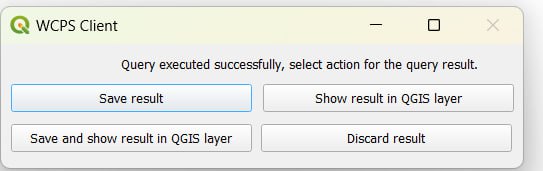
- To save the query result click the Save result button
- To show the file in QGIS click the Show result in QGIS layer button
- To save and show the file in QGIS click the Save and show result in QGIS layer button.
- To ignore the result click the Discard result button
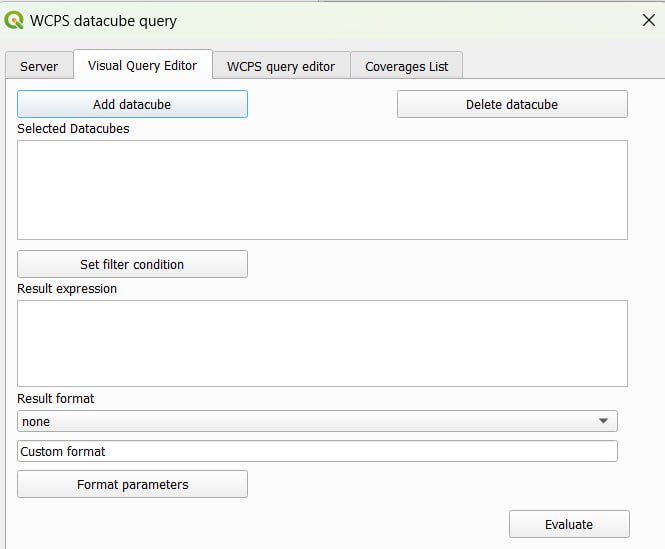
The Visual Query Editor tab allows to construct the high-level structure of the query with buttons and inputs with support for code-completion.
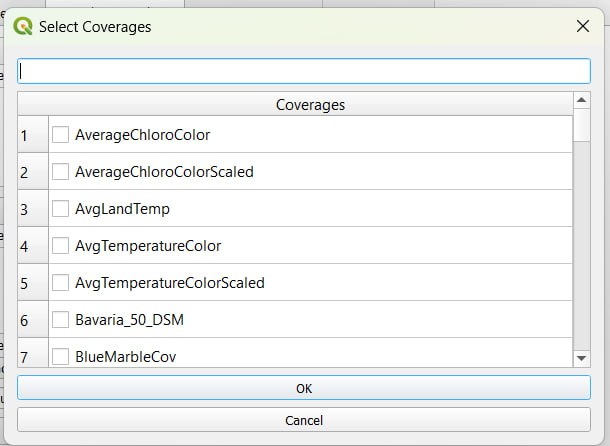
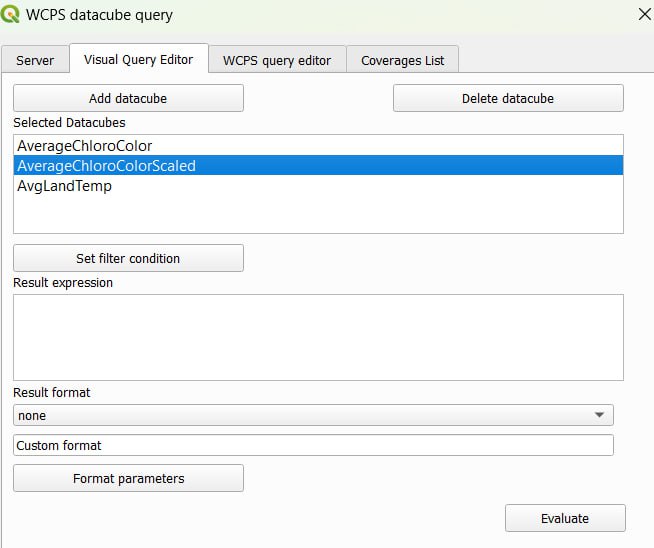
To add datacubes over which you will iterate in the for part, click the Add datacube button, which allows to select datacubes from the list of available ones on the server and enter a variable that will be used to refer to the datacube in the query body.
To remove datacubes from the list, select them in the Selected Datacubes list and click the Delete Datacube button.
To add multiple variables for iteration click on the Add datacubes button several times. To add filtering to your query (a WHERE clause) click on the Set filter condition button and enter the necessary conditions.
The Result expression field should contain the processing expression that should be calculated as a result. Select the format in which the result will be encoded in the drop-down list; to specify a custom format, select custom from the drop-down list and write it in the corresponding field.
You can also specify the format parameters by clicking on the Format Parameters button and entering them in a special field in the window that opens. After specifying all the required data, click the Evaluate button to send the generated query. If the query is successful, you will see a window for choosing further actions with the results of the request.